

Mobile App Configuration
Point the app at your SaleX server, then make it yours: colors, name, package identifier and launcher icon.
On this page
Ctrl + P on Windows/Linux, Cmd + P on macOS) for the file name.Set the base URL
The base URL tells the app where your SaleX server lives. Open:
lib/utils/app_constant.dartUpdate the value:
static const String baseUrl = "https://yourdomain.com";https://yourdomain.com. Do not use localhost for a build you will install on a phone, because a phone cannot reach your computer's localhost.Rebuild the app after changing the base URL.
✓ Success looks like: the app opens and loads products from your store.
Theme (light and dark)
The app supports light and dark mode. Colors, text styles and card styles are set in the theme files:
lib/
└── theme/
    ├── light_theme.dart
└── dark_theme.dartOpen the file for the mode you want to change and edit the colors and styles to match your brand. Light theme applies in normal mode and dark theme applies when the phone is in dark mode.
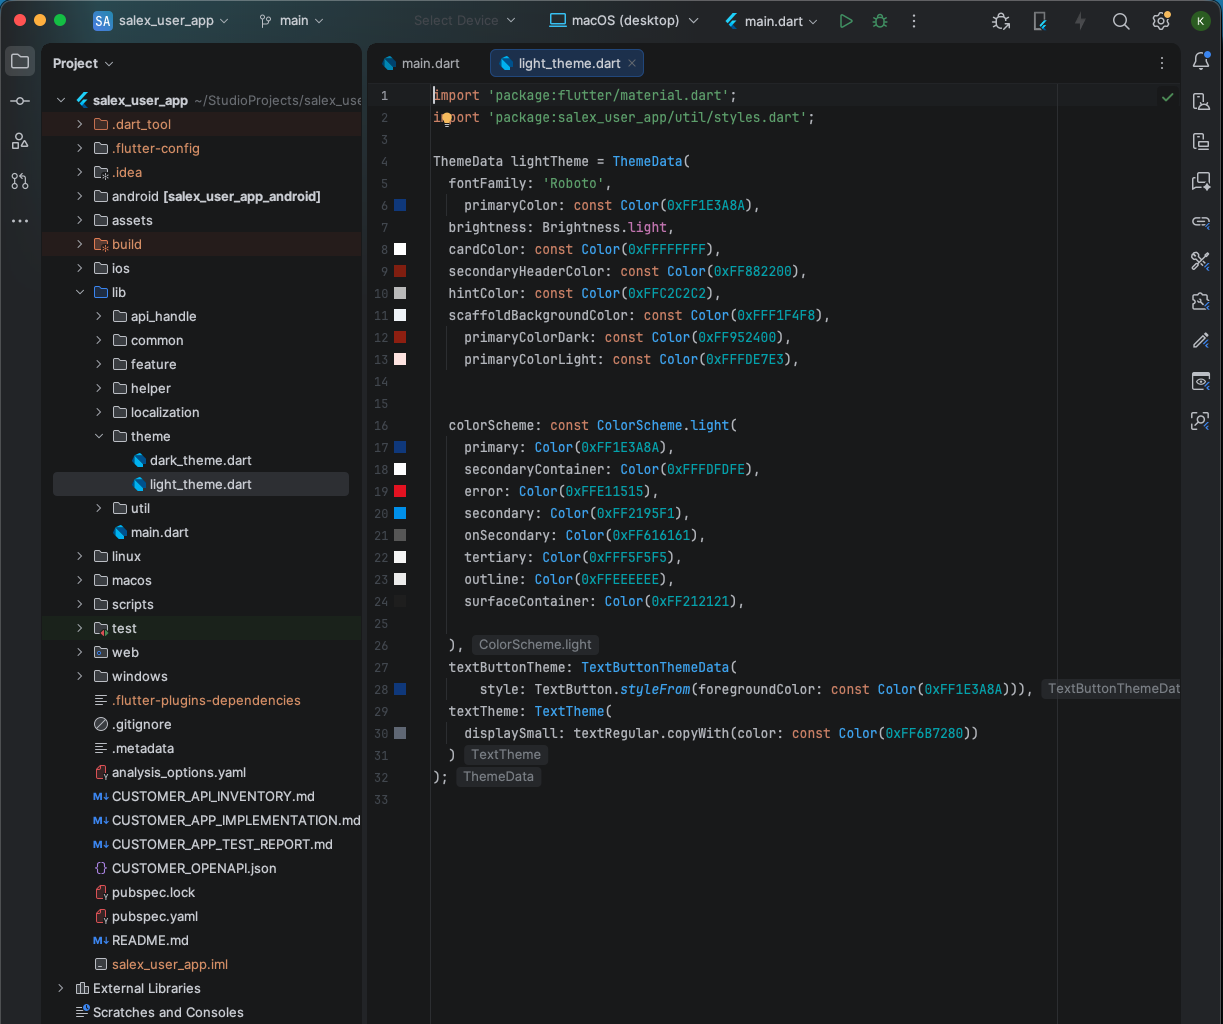
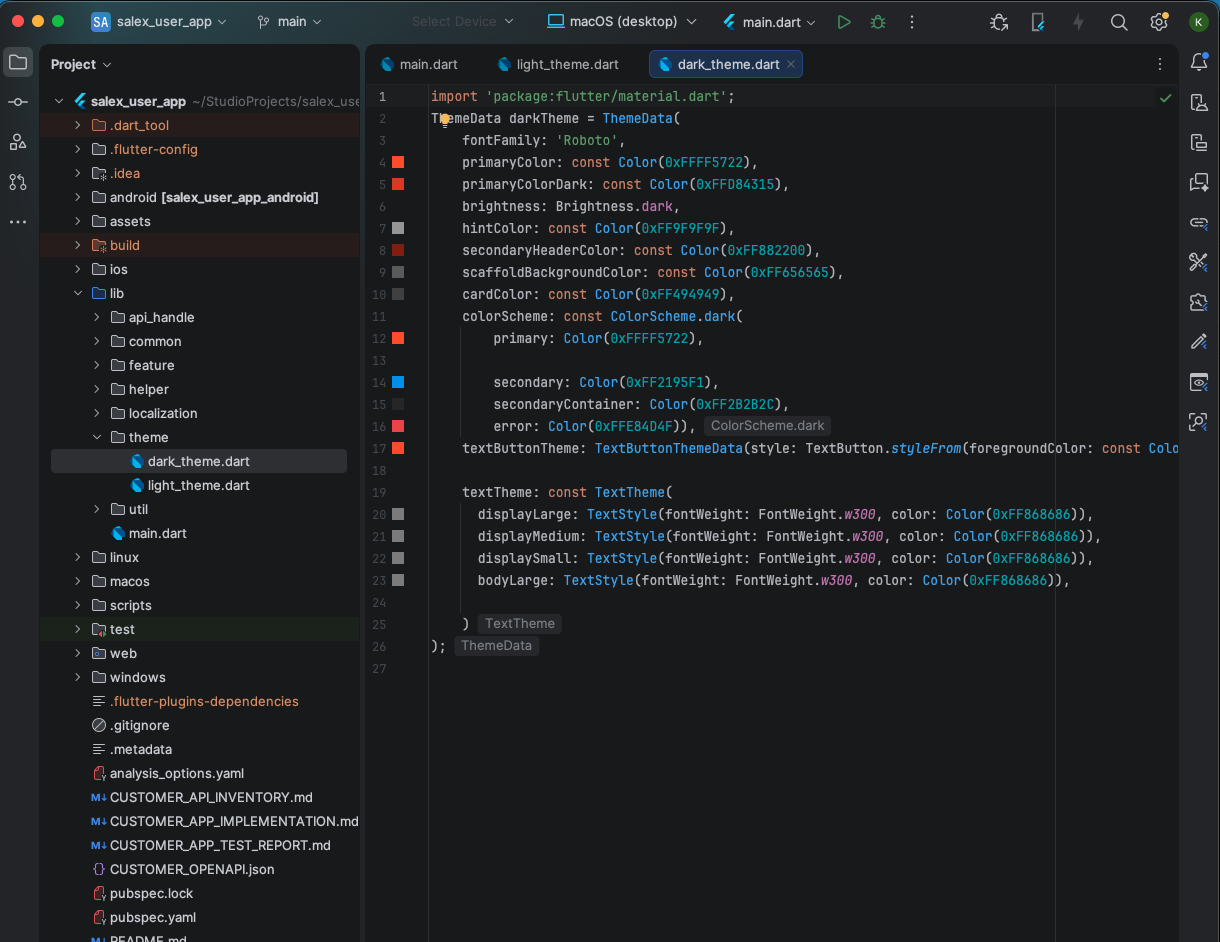
Apply the changes:
flutter clean
flutter pub get
flutter runChange the app name
The name appears in three places. Change all three so they match.
-
In the Flutter code
Edit
appNameinlib/utils/app_constant.dart.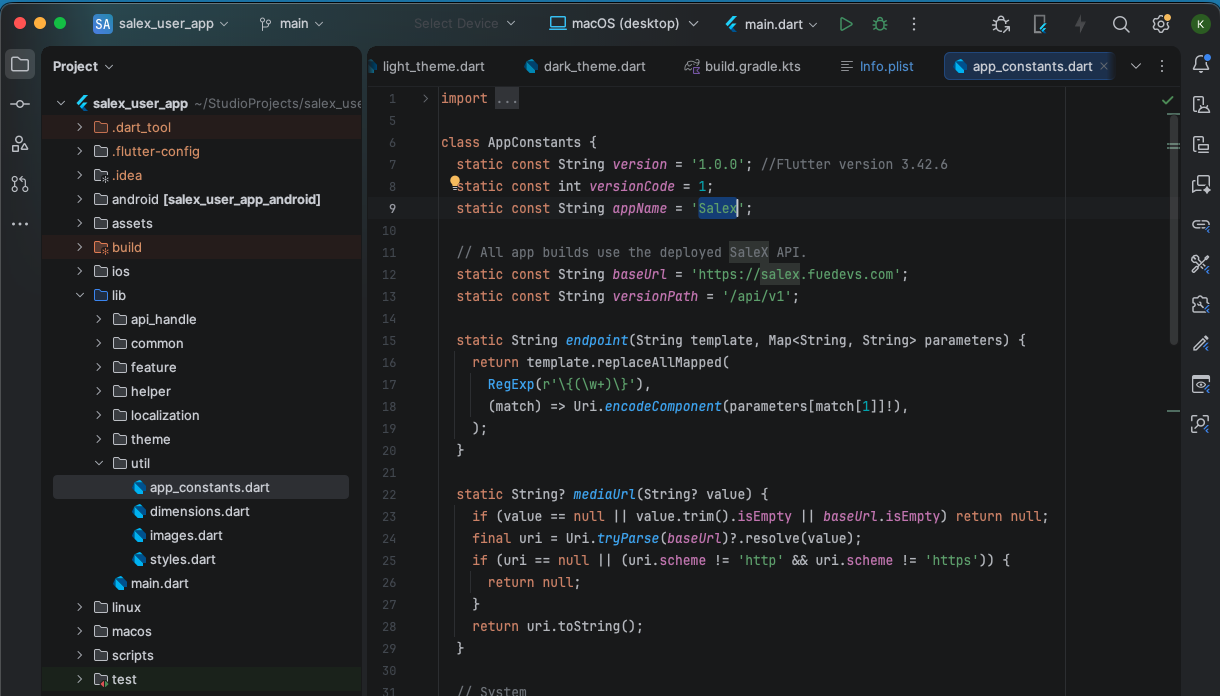
Changing appName in the constants file -
On Android
Update the
android:labelvalue inandroid/app/src/main/AndroidManifest.xml.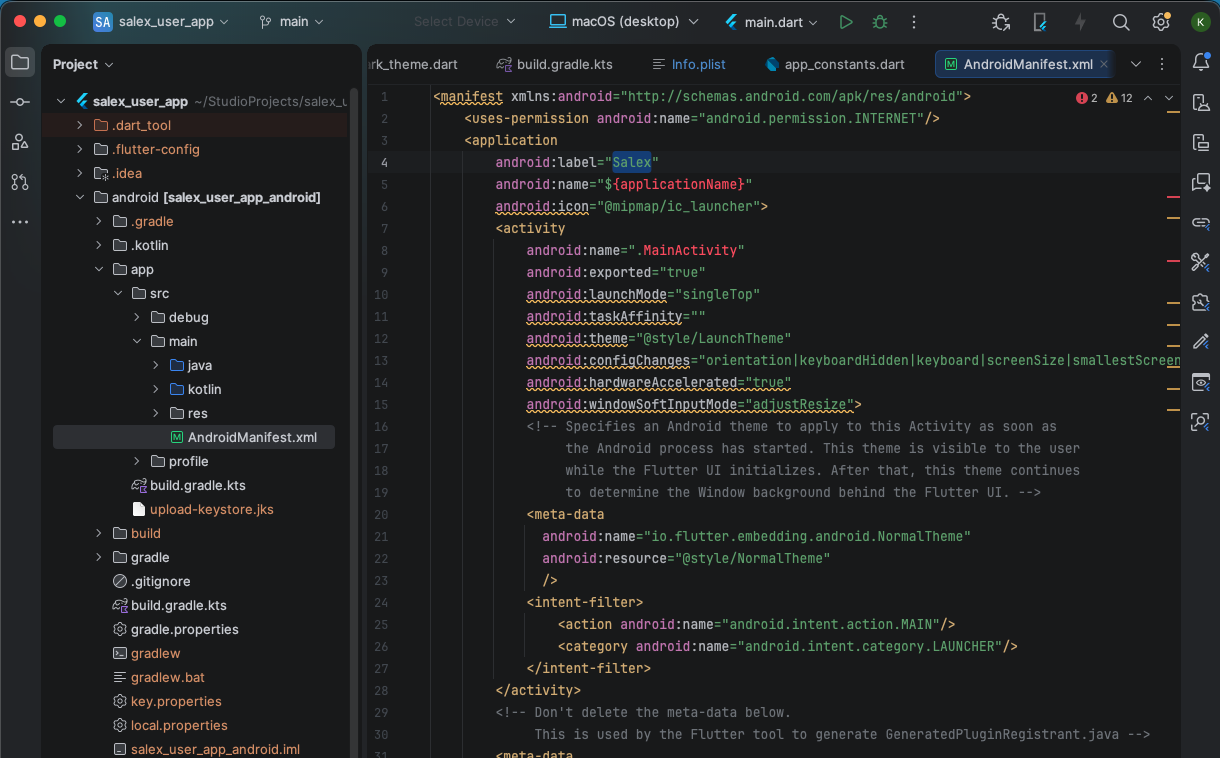
Application label in AndroidManifest.xml -
On iOS
Update the
CFBundleDisplayName/CFBundleNamevalues inios/Runner/Info.plist.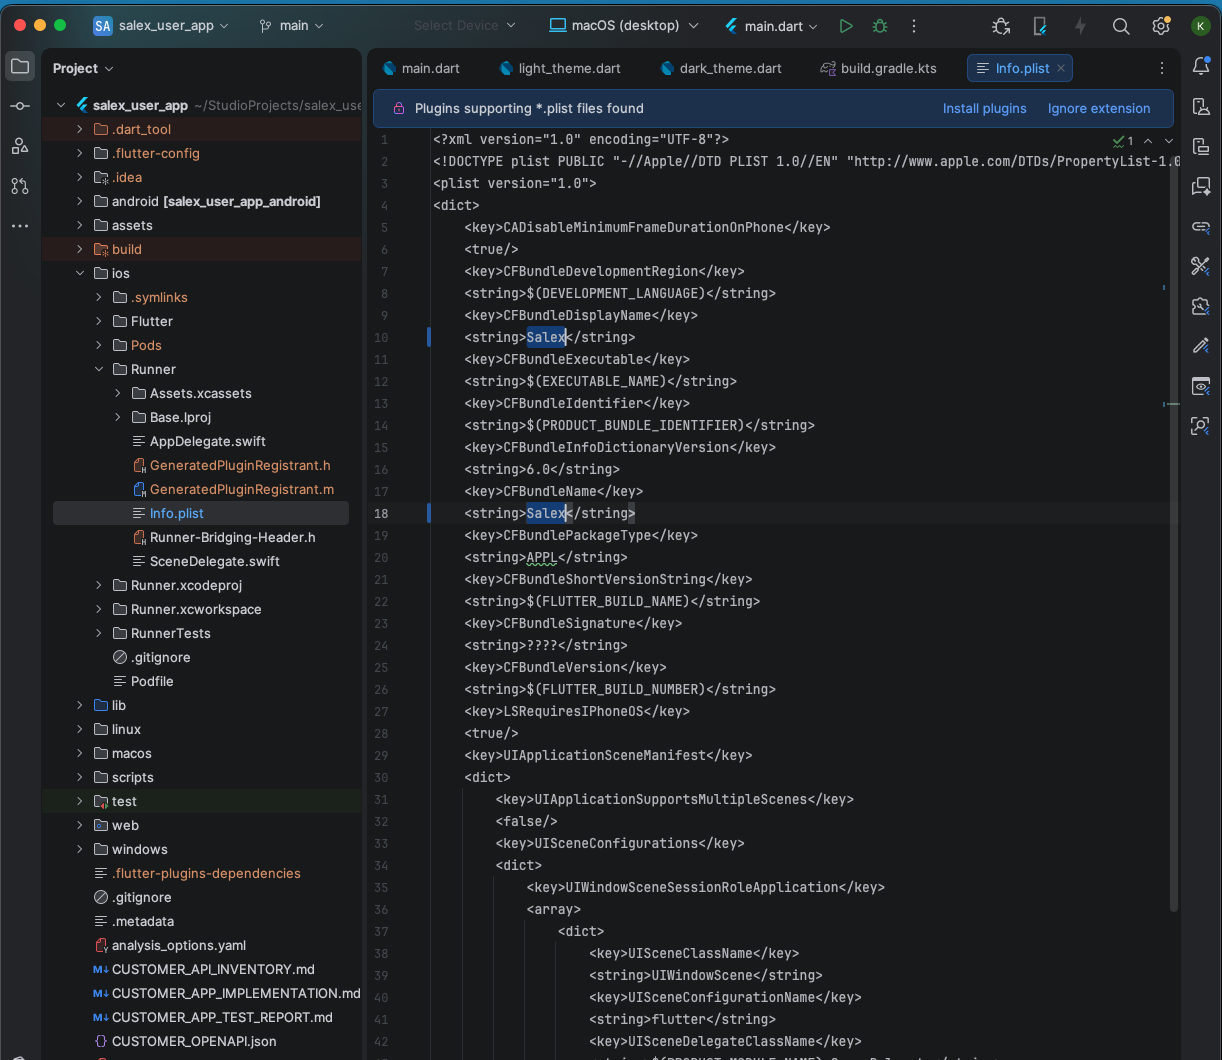
App name in Info.plist
Change the package name
Every Android app has a unique package name (for example com.yourcompany.salex). Change it before you publish, because it cannot be changed after the app is live on Google Play.
Open android/app/build.gradle and find the namespace entry inside the android block:
android {
    namespace = "com.yourcompany.salex"
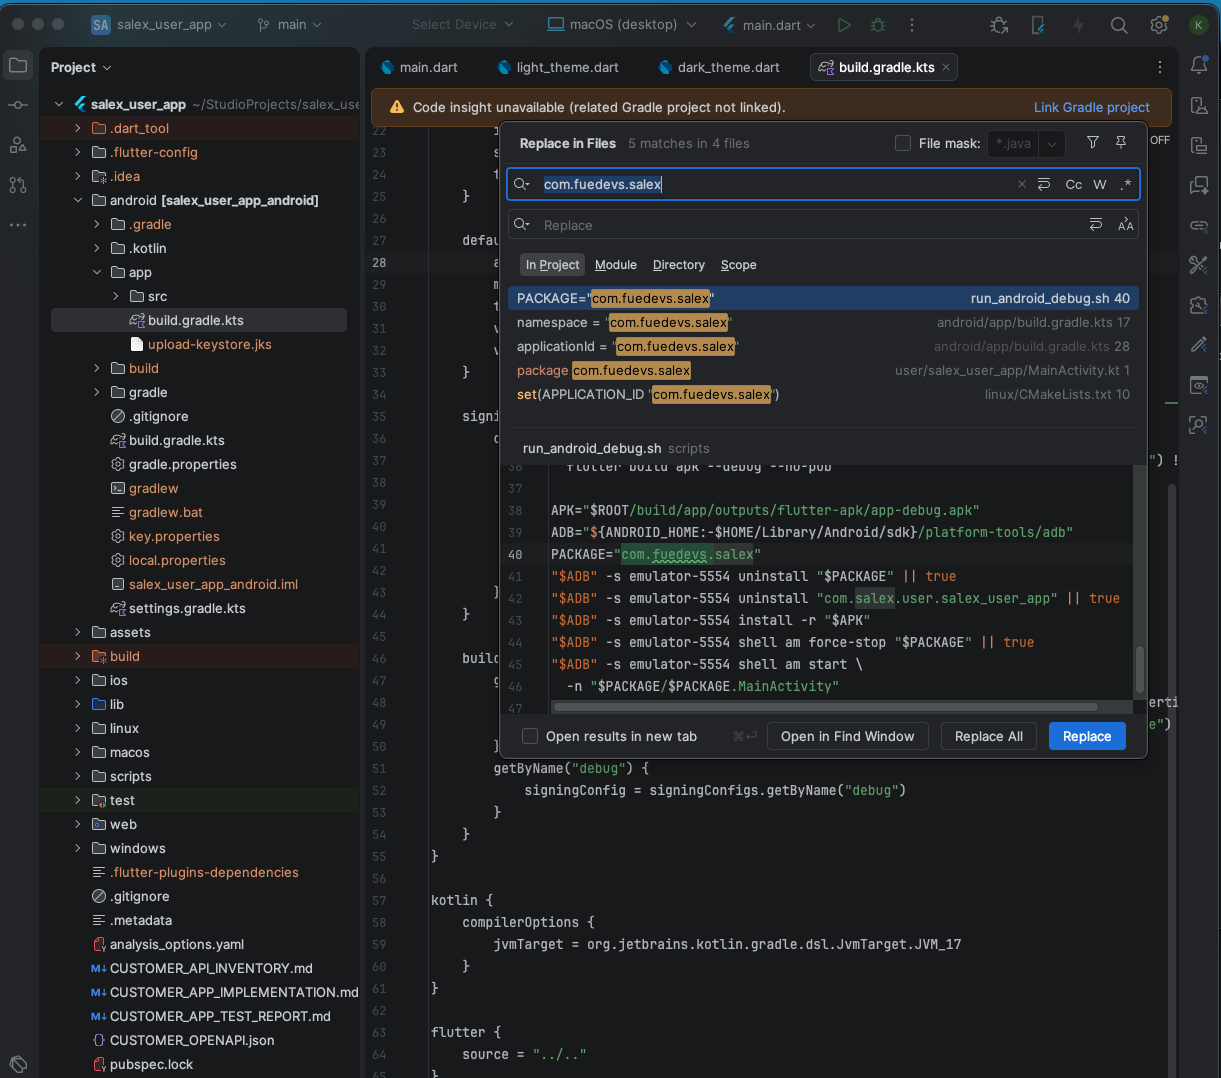
}Then use your IDE's global find-and-replace across the whole project to replace the old package name with the new one.
- Windows / Linux:
Ctrl + Shift + R - macOS:
Command + Shift + R
Files to review afterwards
android/app/build.gradleandroid/app/src/main/AndroidManifest.xmlandroid/app/src/debug/AndroidManifest.xmlandroid/app/src/profile/AndroidManifest.xmlandroid/app/src/main/java/orandroid/app/src/main/kotlin/(folder names must match the new package)
Then clean and rebuild:
flutter clean
flutter pub get
flutter rungoogle-services.json.Change the app icon
Generate every icon size you need from one image with a free tool such as appicon.co. Upload a square logo (1024 × 1024 px works well) and download the generated package.
-
Android
Replace all
mipmap-*folders insideandroid/app/src/main/reswith the generated ones. -
iOS
Replace the
AppIcon.appiconsetcontents insideios/Runner/Assets.xcassetswith the generated files.
Keep the generated folder structure and file names unchanged. Apply the change:
flutter clean
flutter pub get
flutter run