

Build for iOS
iOS builds require a Mac with Xcode and an Apple Developer account. This page covers opening the project, naming the app and preparing it for signing.
On this page
GoogleService-Info.plist added. See Firebase Configuration.Open the project in Xcode
Install iOS dependencies
flutter pub get cd ios pod installOpen the workspace
In Xcode choose File → Open, go to the project's
iosfolder and openRunner.xcworkspace(the .xcworkspace file, not .xcodeproj).
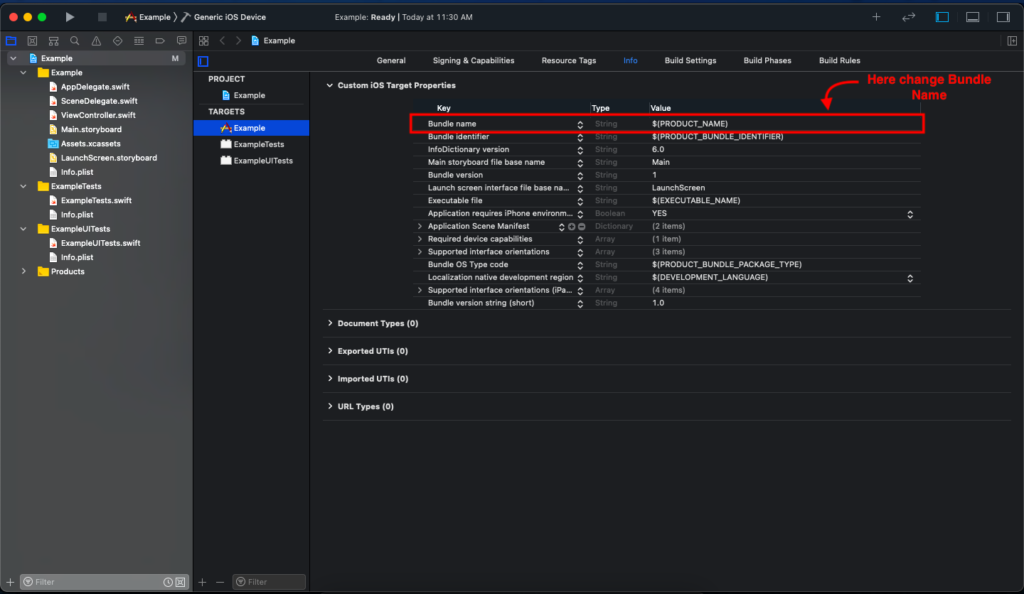
Change the bundle name
Select the project
Click Runner in the project navigator and choose the application target.
Open the Info tab
Edit Bundle name (and Bundle display name) to your app's name.
Change the bundle identifier
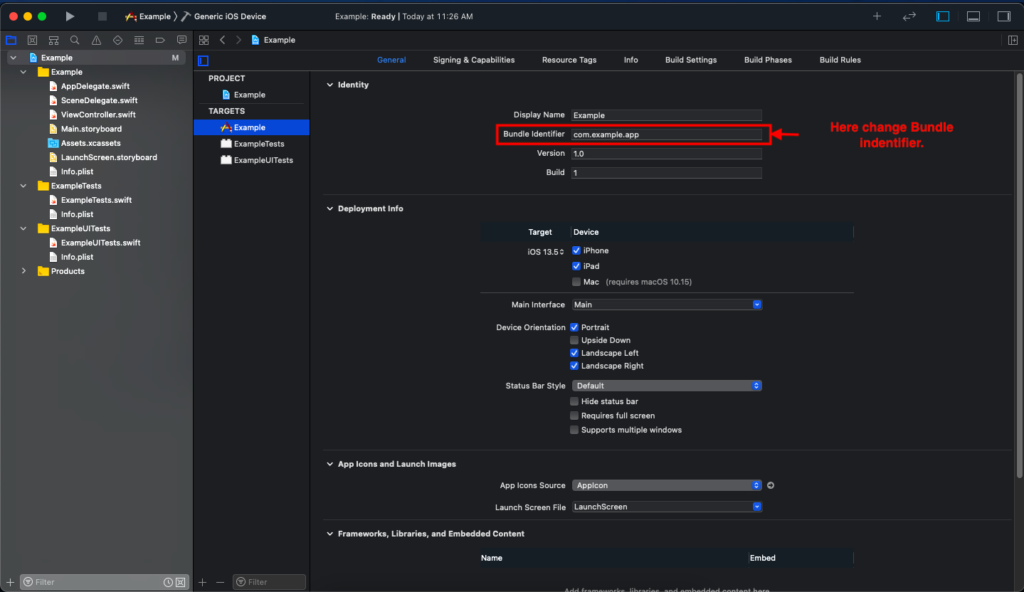
Open General
With the target selected, open the General tab.
Edit the identifier
Update Bundle Identifier to your own, for example
com.yourcompany.salex.
Signing and archive
Select your team
Open Signing & Capabilities, tick Automatically manage signing, and choose your Apple Developer team.
Add Push Notifications
Click + Capability and add Push Notifications and Background Modes → Remote notifications.
-
Build the release
flutter build ipaOr in Xcode choose Product → Archive.
Upload to App Store Connect
In the Xcode Organizer click Distribute App → App Store Connect and follow the prompts.
✓ Success looks like: the build appears in App Store Connect under TestFlight after processing.
Push certificate (APNs) walkthrough
iOS push notifications need an Apple Push Notification service certificate (or an APNs key). If you use a certificate, create it like this:
Request a certificate from Keychain Access
On your Mac open Keychain Access → Certificate Assistant → Request a Certificate From a Certificate Authority…
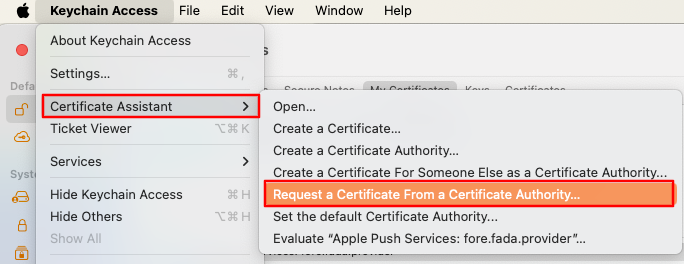
Request a certificate in Keychain Access Fill in the Certificate Assistant
Enter your email address, choose Saved to disk, and click Continue.
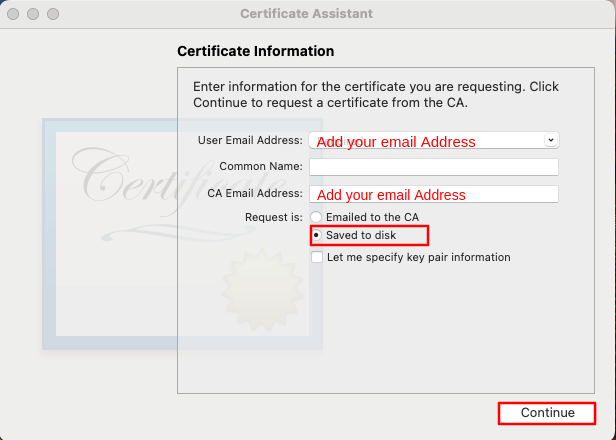
Certificate Assistant Create the push certificate
In the Apple Developer portal under Certificates, Identifiers & Profiles, create a new certificate and choose Apple Push Notification service SSL (Sandbox & Production).
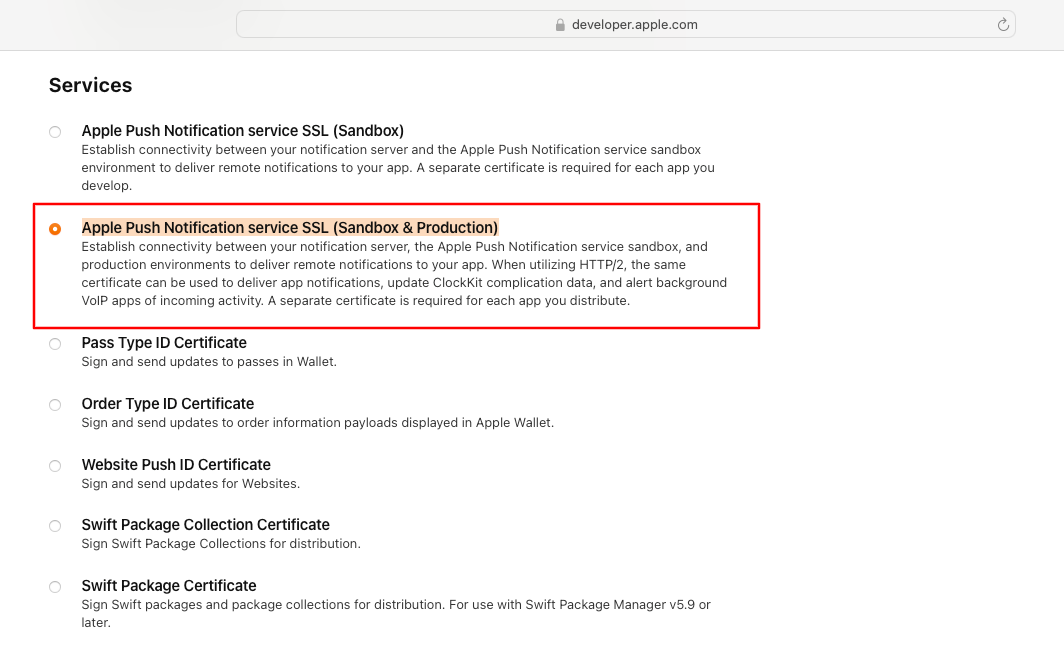
Choose the Sandbox & Production push certificate Select your App ID and upload the request
Pick the App ID that matches your bundle identifier, upload the certificate request file from step 2, then download the certificate and upload it in Firebase (Project settings → Cloud Messaging).
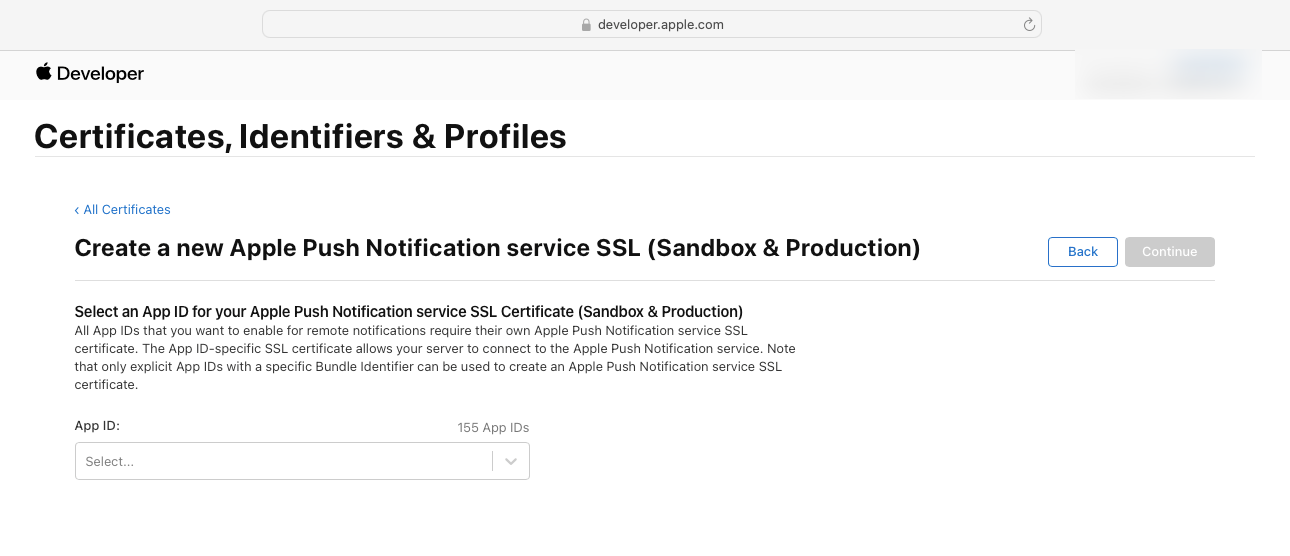
Select the App ID